Saturday, May 16, 2015

Singleton and Multiton Design Patterns


Singleton

One of the simplest design patterns is the Singleton. The purpose of Singleton design pattern is to always have a single instance of a some class. Singletons are usually used for things you don't necessarily need multiple instances of such as database or logging or similar. You always work with same instance of a singleton object.

This is how you create a singleton:

class MySingleton
{
    public static function getInstance()
    {
        static $instance;

        if (null === $instance) {
            $instance = new self();
        }

        return $instance;
    }

    // prevent creating multiple instances due to "private" constructor
    private function __construct(){}

    // prevent the instance from being cloned
    private function __clone(){}

    // prevent from being unserialized
    private function __wakeup(){}
}

Usage:

$instance = MySingleton::getInstance();

Following the same pattern, you can create your own singletons and add any necessary functionality you want. The main trick here is that we have made the constructor private which is what disallows creation of multiple instances of singleton class.

It is important to point out that Singleton design pattern is considered anti-pattern (and more so in the world of PHP) because of following reasons:

  • Singletons create global state which is bad; they create tight-coupling
  • Singletons are essentially class-oriented not object-oriented
  • We cannot tell what dependencies it contains, it hides logic
  • Because you cannot create multiple instances, you cannot easily test them
  • PHP runs on shared nothing architecture which essentially means unlike other languages like Java/.Net, life of a PHP application is just one http request which is why singletons do not make much sense in PHP

Having said that, many argue that you can at least use singletons for single-nature things like an instance of database or logging (though it is matter of personal preference on how you design database or logging stuff) while others avoid singletons completely (especially TDD Worshipers).

That's all there is to a singleton.

Multiton

As the name suggests, a multiton is a design pattern that helps you create multiple instances of itself. Both singleton and multiton are same, the only difference is that a multiton can store and retrieve multiple instances of itself. Obviously multiton suffers from same problems as singletons.

Here is example of multiton:

class Logger
{
    private static $instances = array();

    public static function getInstance($key)
    {
        if(!array_key_exists($key, self::$instances)) {
            self::$instances[$key] = new self();
        }

        return self::$instances[$key];
    }

    // prevent creating multiple instances due to "private" constructor
    private function __construct(){}

    // prevent the instance from being cloned
    private function __clone(){}

    // prevent from being unserialized
    private function __wakeup(){}
}

Usage:

$firstInstance = Logger::getInstance('file');
$secondInstance = Logger::getInstance('email');


Friday, May 15, 2015

Factory Design Pattern


Overview

Factory design pattern works like a factory in the real world in that it creates something for others to use. In the context of OOP, it helps in creating and instantiating objects.

Example

Let's say for our application we are using different types of databases based on requirement such as MySQL, PostgreSQL, and SQLite. Our classes look like this:

MySQL:

class MySQLDB
{
    public function setHost($host)
    {
        // code
    }
    public function setDB($db)
    {
        // code
    }
    public function setUserName($user)
    {
        // code
    }
    public function setPassword($pwd)
    {
        // code
    }
    public function connect()
    {
        // code
    }
}

PostgreSQL:

class PostgreSQLDB
{
    public function setHost($host)
    {
        // code
    }
    public function setDB($db)
    {
        // code
    }
    public function setUserName($user)
    {
        // code
    }
    public function setPassword($pwd)
    {
        // code
    }
    public function connect()
    {
        // code
    }
}

...and so on for SQLite database.

Then we instantiate different objects based on configuration:

if (Config::item('db_type') === 'mysql') {
    $DB = new MySQLDB();
    $DB->setHost("host");
    $DB->setDB("db");
    $DB->setUserName("user");
    $DB->setPassword("pwd");
    $DB->connect();
}
elseif (Config::item('db_type') === 'postgre') {
    $DB = new PostgreSQLDB();
    $DB->setHost("host");
    $DB->setDB("db");
    $DB->setUserName("user");
    $DB->setPassword("pwd");
    $DB->connect();
}
elseif (Config::item('db_type') === 'sqlite') {
    $DB = new SQLiteDB();
    $DB->setHost("host");
    $DB->setDB("db");
    $DB->setUserName("user");
    $DB->setPassword("pwd");
    $DB->connect();
}

Generally above works but it creates problems in rather big applications. Above code has these problems:

  • Should you add more database types, code would keep on growing making it complex
  • The code is hard coded with database type names
  • Whole process becomes tedious

To solve these issues, we can instead create a central factory object that would create those objects for us:

class DBFactory
{
    protected $driver = null;

    public function setDriver($driver)
    {
        $this->driver = $driver;
    }

    public function makeDB($host, $user, $pass, $dbname)
    {
        if ($this->driver === 'mysql') {
            $DB = new MySQLDB();
        }
        elseif ($this->driver === 'postgre') {
            $DB = new PostgreSQLDB();
        }
        elseif ($this->driver === 'sqlite') {
            $DB = new SQLiteDB();
        }

        $DB->setHost($host);
        $DB->setDB($dbname);
        $DB->setUserName($user);
        $DB->setPassword($pass);
        $DB->connect();

        return $DB;
    }
}

And then using it:

$dbFactory = new DBFactory;
$dbFactory->setDriver(Config::item('db_type'));
$DB = $dbFactory->makeDB("host", "db", "user", "pwd");

And that's it. You won't have to modify above code, it will always remain same, we have moved the complex object creation logic separate in the factory itself which now makes our code a lot more easier to work with.

Please notice that there are some variations of factory design pattern such as simple factoryabstract factory and factory method. In this example, we used the factory method eg we used a method named makeDB() to create our objects. Other variations are almost similar; for example with abstract factory, you actually create an abstract class and then all concrete classes should extend it. It just enforces commonality between similar concrete classes.

Note: In modern day, the object creation has become very simple with the help of Dependency Injection Containers and Service Locators. There are quite some DICs to choose from for PHP.


Thursday, May 14, 2015

Quick Learning Resources via StackOverflow

 Did you know that you that other than asking questions and answering, you can also use StackOverflow to find very useful information and learning resources for certain language or technology? Do you want to get started with some new programming language or technology ? StackOverflow can help you get started.

StackOverflow can help you get started by providing you with information such as history of some language/technology, books, references, commonly asked questions and tools, videos and more. Here is the format of the URL you can go to and find out useful information about certain language or technology:

http://stackoverflow.com/tags/TECHNOLOGY/info

In above URL, replace TECHNOLOGY with what you want to learn about such as javascriptphp.net, etc

Here are few examples:

Of course, you can replace tag in above URL from various tags to choose from.

Wednesday, May 13, 2015

Creating Your Own Artisan in PHP

 This post is basic tutorial of how you can create your own command line tool. I will try to explain things step by step so things are easily understood.

When I first saw Laravel framework, I really liked its Artisan console tool, it seemed like magic providing us with a bunch of stuff we could do with it such as creating MVC triads, running migrations and a lot more. Although similar concepts already existed in frameworks like CakePHP but Laravel did good job of making us realize how useful a console app can be and that we can use it beyond basic CRUD operations.

To create a console app, we can use Symfony's console component and in fact Laravel also uses the same. We could also use Aura.Cli from AuraPHP but for this post, we will stick with one provided by Symfony.

Installing Symfony Console Component

The easiest way to install it is via composer. Create a new folder in your document root named consoleApp and inside it create composer.json file with these contents:

{
    "require" :{
        "symfony/console": "2.6.7"
    }
}

and then run composer install command in newly created folder from your cli application. After some while you should have vendor directory created.

Creating Our First Command

A command is something that performs an specific task. For example, in Laravel's artisan tool, you can type this:

> php artisan app:name yourAppName

Here app:name is a command that can changes namespace of your Laravel application. Here is also breakdown of above line:

  • php - php executable (php.exe). This assumes you have already added php.exe in your PATH enviroment variable in your system
  • artisan - The name of the console application
  • app:name - The name of the command that will be run
  • yourAppName is an argument to the app:name command

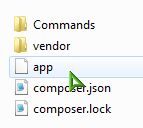
Create a Commands folder in root of application, this will contain all our commands for the console app we will be creating. Also create empty file called app (without extension) either by using editor of your choice or running this command via your cli in app root folder touch app. The folder structure should now look like this:

enter image description here

Open app app file in editor of your choice and paste this line in it:

#!/usr/bin/env php

This tells the system that is a php env file and should be run by php executable. You may need to apply execute permission on this file if you are on Linux.

Next, let's include our dependencies through composer's autoload feature, so add this line:

require __DIR__ . '/vendor/autoload.php';

This will automatically include our dependencies which in this case is Symfony Console Component.

By now app file should have these contents:

#!/usr/bin/env php
<?php
require __DIR__ . '/vendor/autoload.php';

Before we edit this file further, let's first create our command which will basically be a Greet command. Our commands will essentially be class files therefore inside Commands directory that we created earlier, create a file called GreetCommand.php.

The Symfony Console Component requires that we should extend it and provide at least two methods called configure() and execute(). As the names suggest, the configure() method can be used to configure our command such as what command will be called, what arguments and options it will accept and the execute() command will actually execute our command.

In GreetCommand.php file, paste in these contents:

<?php
use Symfony\Component\Console\Command\Command;
use Symfony\Component\Console\Input\InputArgument;
use Symfony\Component\Console\Input\InputInterface;
use Symfony\Component\Console\Input\InputOption;
use Symfony\Component\Console\Output\OutputInterface;

class GreetCommand extends Command
{
    protected $commandName = 'app:greet';
    protected $commandDescription = "Greets Someone";

    protected $commandArgumentName = "name";
    protected $commandArgumentDescription = "Who do you want to greet?";

    protected $commandOptionName = "cap"; // should be specified like "app:greet John --cap"
    protected $commandOptionDescription = 'If set, it will greet in uppercase letters';    

    protected function configure()
    {
        $this
            ->setName($this->commandName)
            ->setDescription($this->commandDescription)
            ->addArgument(
                $this->commandArgumentName,
                InputArgument::OPTIONAL,
                $this->commandArgumentDescription
            )
            ->addOption(
               $this->commandOptionName,
               null,
               InputOption::VALUE_NONE,
               $this->commandOptionDescription
            )
        ;
    }

    protected function execute(InputInterface $input, OutputInterface $output)
    {
        $name = $input->getArgument($this->commandArgumentName);

        if ($name) {
            $text = 'Hello '.$name;
        } else {
            $text = 'Hello';
        }

        if ($input->getOption($this->commandOptionName)) {
            $text = strtoupper($text);
        }

        $output->writeln($text);
    }
}

The code is pretty much self-explanatory:

  • $commandName is the name of our command
  • $commandDescription is description/help text for our command
  • $commandArgumentName is argument name of our command
  • $commandOptionName is option name of our command. The difference between argument and option is that an option is optional one unlike argument and can be specified with --optionName.
  • Inside configure() method, we can easily understand how we set command name, argument and options.
  • Inside execute() method, we get argument and check to see if it is set. If set, we say Hello Name otherwise we simply say Hello. Then we check if option is provided and if so we upper case it and finally output the result.

Now finally let's tell Symfony Console Component to use our command we just created. Modify app file so it looks like this:

#!/usr/bin/env php
<?php
require __DIR__ . '/vendor/autoload.php';

use Symfony\Component\Console\Application;

$application = new Application();

# add our commands
$application->add(new GreetCommand());

$application->run();

Let's test our command. Open your cli app and point it to our app root and run this command:

> php app app:greet John

That should result in error that GreetCommand.php flle was not found. Let's tell composer to automatically include our commands from Commands folder. Edit composer.json file so it looks like this:

{
  "require": {
    "symfony/console": "2.6.7"
  },
  "autoload": {
    "classmap": ["Commands"]
  }
}

and then type composer dump -o from your cli app. Now run our command again:

> php app app:greet John

and you should see Hello John. Type:

> php app app:greet John --cap

and you should see HELLO JOHN.

Here we named our console file app but if you rename it to artisan and then run above commands replacing app with artisan, you will have your own artisan tool, funny enough :)

Of course, you can now add any commands you want to your new console app. You can even run composer or git commands through your new console app or may be some deployment/build scripts or even system commands. If you are using some MVC framework, you can use this tool to for example create your own way of creating controllers, entity classes, run your custom migrations, call methods from your controllers and more.

If you want to see how Laravel does it all, you can take a look inside this folder and see how those commands are created:

vendor/laravel/framework/src/Illuminate/Foundation/Console

I am currently working on a project powered by CodeIgniter (and it doesn't have built-in console app as you know) and I have created quite some commands that have really helped me speed up my development time where I do a host of different things via my console app.

Have fun with your artisan tool :)

Monday, May 11, 2015

Adapter Design Pattern


Overview

The adapter design pattern as the name suggests is like real life adapter that converts one thing into some other one. Similarly, it can help us wrap functionality of some object into adapter providing us with consistent methods/API to work with. Understanding through an example is always the best way to learn.

Example

Suppose you have developed a website where client has asked you to allow users to post status updates on the Facebook. In order to to that, we use Facebook PHP client library which looks something like this:

class Facebook {    
    public function getUserToken($userId) {
        // code to get user token
    }

    public function postUpdate($message) {
        // code to post status update
    }
}

And then you use it to post updates on Facebook:

$statusUpdate = new Facebook;
$statusUpdate->getUserToken($someUserId);
$statusUpdate->postUpdate('some message');

Now let's assume suddenly client requires that instead of Facebook, he wants users to post updates on Twitter and Twitter's PHP client library looks like this:

class Twitter {    
    public function checkUserToken($userId) {
        // code to get user token
    }

    public function setStatusUpdate($message) {
        // code to post status update
    }
}

And here is the problem. We can see that Twitter's library has different method names which means we will have to modify code everywhere where we are using status updates. At this point, as developer, we should also not overrule the fact that client may again ask to use Facebook again or may be some other service to allow users to post status update but we don't want to change our code again and again.

So how do we make sure that:

  • We should be able to add any new service easily when client asks
  • We should be able to not modify code again and again, same code should post status updates without modifying it

This is where Adapter pattern comes out to be as life saver. In order to implement that, we first set rules/interface that all status update service should follow so let's create one:

interface iStatusUpdate {
    function getUserToken($userId);
    function postUpdate($message);
}

Now we create our Twitter adapter class:

class TwitterAdapter implements iStatusUpdate {

    protected $twitter;

    public function __construct(Twitter $twitter){
        $this->twitter = $twitter;
    }

    public function getUserToken($userId) {
        $this->twitter->checkUserToken($userId);
    }

    public function postUpdate($message) {
        $this->twitter->setStatusUpdate($message);
    }
}

Notice how we have passed Twitter object via the constructor. Of course we could have used setter or interface injection as well.

We can see that we now have same method names for Facebook and Twitter which means we won't have to modify much code in our codebase where we need to post status updates for users. Now all we need to do is to use our new adapter class providing it with actual Twitter object:

$statusUpdate = new TwitterAdapter(new Twitter);
$statusUpdate->getUserToken($someUserId);
$statusUpdate->postUpdate('some message');

As can be we have added a line or couple but most of status update code remains same, thanks to adapter pattern. We as developers should foresee such changes client may require in which case we would have created adapter class even for our first Facebook service and then we didn't need to modify even a single line of code.

Okay, client asks some other service to use, no problem:

class SomeOtherServiceAdapter implements iStatusUpdate {

    protected $otherService;

    public function __construct(SomeOtherService $otherService){
        $this->otherService = $otherService;
    }

    public function getUserToken($userId) {
        $this->otherService->authenticate($userId);
    }

    public function postUpdate($message) {
        $this->otherService->postMessage($message);
    }
}

And then:

$statusUpdate = new SomeOtherServiceAdapter(new SomeOtherService);
$statusUpdate->getUserToken($someUserId);
$statusUpdate->postUpdate('some message');

Again most of the code remains same.

So these simple examples show how useful and time-saver adapter pattern is. It provides us with consistent API to work with and allows us to use new services easily.


Popular Posts